
Creating beautiful decorations at home can be simple and fun. With the 3d paper star ebook free download, kids and adults alike can enjoy crafting eye-catching designs. This guide offers easy-to-follow instructions and templates for making stunning stars that brighten up any room. Get ready to explore how this creative project can bring joy and charm to your home decor while sparking creativity in your kids. Download the free eBook today and start crafting!
Making 3D paper stars is a fun craft project for holidays, parties, or home decor. These stars look fancy but are easy to make with a little practice. Follow this guide to create your own glowing, glittery, or colorful stars. Let’s get started!

I. Preparation & Planning
A. Get a Star Template
First, you need a star template. You can find free templates online as PDFs or SVG files. Search for “3D paper star template” and pick one you like. Some templates let you choose how many points the star has—5, 7, or 8. If you’re feeling creative, you can even draw your own!
B. Pick Your Supplies
- Paper: Use thick paper like cardstock (around 65 lb or 120 gsm). Thin paper won’t hold the star’s shape. For a shiny look, try metallic or glitter paper. Foil paper works too, but it can tear easily when folding.
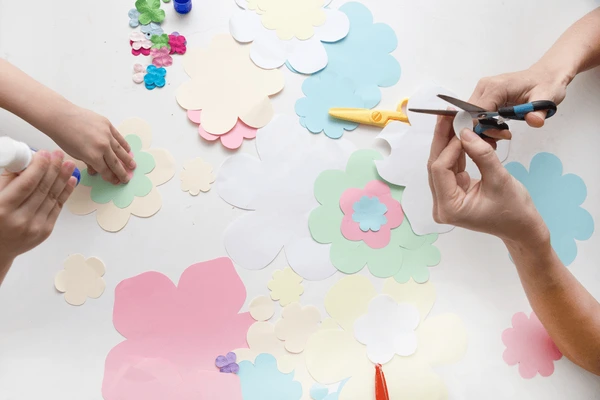
- Cutting Tools: Scissors work for simple designs. For detailed cuts, use a craft knife or a cutting machine like Cricut.
- Glue: A glue stick or quick-drying craft glue is best. Hot glue is good for attaching hanging loops. Double-sided tape also works.
- Extra Supplies: A ruler, scoring tool (like a butter knife), string, beads, LED lights, or markers for decorating.

II. Cutting & Scoring
A. Cut Out the Star Shapes
- Print or Trace: If using a template, print it or trace it onto your paper. For cutting machines, upload the template and let the machine do the work.
- Cut Carefully: Use scissors or a craft knife to cut along the lines. Take your time—smooth edges make the star look neat. Cut as many shapes as your template requires (usually 2 per star).
B. Score the Fold Lines
- Find the Fold Lines: Templates mark where to fold. If using a cutting machine, it might score these lines for you.
- Score by Hand: Place a ruler along the fold line. Gently drag a craft knife or scoring tool along the line. Don’t cut through the paper—just make a shallow groove. This helps the paper fold neatly.

III. Folding & Shaping
A. Fold Along the Scored Lines
- Fold each flap inward along the scored lines. Crease the folds firmly with your fingers.
- Pinch the points toward the center to start shaping the star.
B. Create the 3D Points
- Fold the sides of each star section upward to form points. Some designs have tabs—fold these too.
- Press the folds flat so the star holds its shape.
IV. Assembling the Star
A. Glue the Points Together
- Apply glue to the tabs or edges of one point. Stick it to the next point, lining up the edges.
- Work one point at a time. Let the glue dry a bit before moving to the next.
- For tricky designs, glue the last point without folding it first. Fold it into place after the glue is set.
B. Join Two Halves (If Needed)
Some stars are made in two halves. Glue the halves together, matching the points carefully. Press firmly to hold them in place.
C. Glue Tips
- Use a small amount of glue. Too much makes the paper soggy.
- Wipe off extra glue with a tissue.
- Avoid gluing the inside of the star—it needs space to stay 3D.
V. Finishing & Decoration
A. Add a Hanging Loop
- Punch a hole in one point with a hole punch.
- Thread string, ribbon, or wire through the hole. Tie a knot.
- For wire loops, secure the ends inside the star with hot glue.
B. Decorate Your Star
- Sparkle: Add glitter by brushing glue on the edges and sprinkling glitter.
- Color: Use markers, watercolors, or pastels to paint patterns.
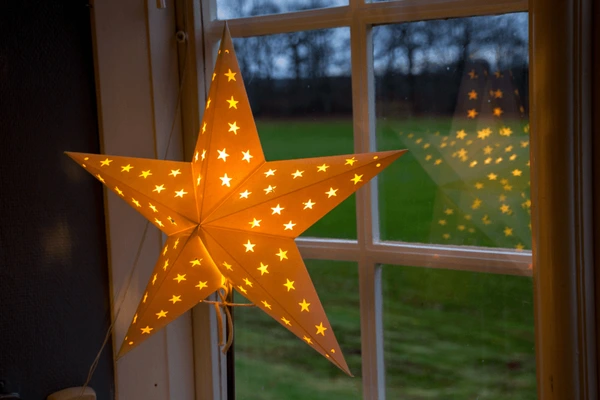
- Lights: Place a small LED tea light inside the star. Or string multiple stars on fairy lights.
- Beads: Tie beads to the hanging loop for extra flair.
C. Display Your Star
Your 3D paper stars aren’t just pretty—they’re practical too! Here’s how to use them in creative ways:
1. Gift Toppers That Double as Ornaments
- How to attach them: Tie a star to the top of a gift box with ribbon or twine. Use a small piece of tape or glue to keep it in place.
- Turn it into an ornament: After unwrapping, hang the star on a Christmas tree, doorknob, or wall hook. Write the recipient’s name or the date on the back for a personal touch.
- Tip: Match the star’s color to the occasion—gold for birthdays, red/green for holidays, pastels for baby showers.
2. Party or Wedding Decor
- Hang them: String stars from ceilings, doorways, or outdoor trees using fishing line (it’s invisible!). Mix sizes and colors for a playful look.
- Table decorations: Scatter small stars around plates or glue them to napkin rings. For weddings, write table numbers on stars.
- Wedding ideas:
- Use white or metallic stars to decorate aisles or chairs.
- Hang a cluster of stars behind the cake table or photo booth.
- Add tiny stars to place cards or invitations.
- Party tips:
- For birthdays, glue stars to balloons or stick them on walls with reusable tape.
- For outdoor events, use waterproof paper or spray stars with clear sealant to protect them from rain.
3. Quick Tips for Better Results
- Make them glow: Tuck battery-powered LED lights inside stars for nighttime magic.
- Go big: Use poster board to make giant stars for photo backdrops.
- Keep it simple: Plain white stars look elegant at weddings. Add glitter or sequins for extra sparkle!
Final Tips
- Practice with scrap paper first.
- If a fold tears, fix it with a tiny piece of tape.
- Mix paper colors for a rainbow effect.
Now you’re ready to make beautiful 3D paper stars! Share them with friends, or keep them to brighten your home. Happy crafting!